Showing posts with label QR Codes. Show all posts

Summer, Summer, Summertime! Time to sit back and....grab some Freebies :)

Hi guys! Jessica here from Pride and Primary. I'm excited to be back blogging on the Punchbowl today. Can you believe it's already April? Honestly, where has this school year gone? 

We've only got 35 days left. 

Of school. 

35. 

That's it. 

*mini heart attack**

And moving on. 

So I thought I would share some of the end of the year things I do in my classroom. I know that many of you don't get out until June, but I'm thinking that will be here before we know it. No time like the present to get things ready and organized. And give you some freebies!


This is the countdown we use! Everyday, we change the number. I've 24 students in my class and once we get to 25 days left, I let the students start keeping the countdown. I put the blank background in a page protector/dry erase board and hang it up. 

Click {HERE} for a copy!


This has to be my favorite. I have 10 envelopes and 10 slips inside. The slips are very simple things that can be done each of the last 10 days of school. 

Extra Recess Day
Move your Seat Day
Movie Day!
Ink Pen Day!
Markers Day!
Hat Day!
Stuffed Animal Day!
Aloha Day!
Shoes Off Day!
Lunch with a Friend Day!

I open a new envelope at the start of each day. It's so simple and the kids LOVE it! Movie Day and Aloha Day are usually our very last two days. Most of the end of year stuff is done (and a lot already go on vacation) so we spend an entire day watching movies and doing other fun stuff. Aloha Day is our end of the year party. We always have a luau! 

Click {HERE} for the pre-made slips.


And here is my newest summer creation. It's a Summer Fun Finder Flap Book. 

I am offering this flap book EXCLUSIVELY to readers of The Primary Punchbowl :) I will eventually upload it to my TpT Store but I want you to have first dibs. 

The Word List is editable. 

The family fun list is editable (not the QR Code). 

All of the summer sites are editable - change out the QR Codes or delete them and just add what you want!

Two bingo boards - one road trip (not editable)
Summer Bingo is editable

Coloring page and brag tags (not editable)
But you can delete my brag tags and add your own or change this flap altogether. 

All of the labels on the flaps can bee changed, too, as well as the fonts. All you have to do is print it out, copy it double sided, stagger it, and fold it over. Staple it and it's done!

Easy Peasy! <-- Click to download! (it's a ZIP file, save to your computer and unzip)

Here is a super quick video showing how to put it together: 


Another one of my favorite end of the year activities is one that my principal gives to us. We always have an end of the year party that's themed. Last year it was Academy Awards. The year before it was Fabulous Fruit.
We got to walk the red carpet last year. So fun! I can't wait til this year!

That's all I have this time! I really do hope the end of the school year is fabulous for you and I hope I've given you some doable ideas! 

Have a great April!


1

Using QR Codes at Parent Teacher Conferences

Welcome to the Primary Punchbowl!!  I'm Megan, from Mrs. Baker's Dozen.  I don't know about y'all, but Spring Break couldn't come quicker!  My kiddos are in crazy mode and all of those full moons last week did not help things a bit.

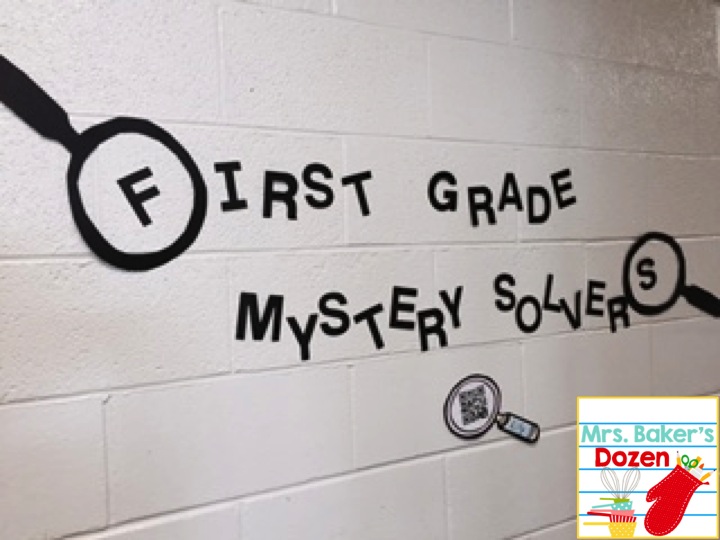
But before we can enjoy a week of relaxation, we have our Parent Teacher Conferences.  My to-do list is super long, y'all!  Cleaning, organizing, REPORT CARDS....whew.  And to put the icing on the cake, we put together an awesome display outside the classroom.  


Last semester, I interviewed the kiddos about their favorite things in school, created a QR code, and had students show their parents how to scan it using our classroom iPads.  This semester, we are solving the MYSTERIES of FIRST GRADE!  

My interviews will consist of these questions:  1.  What was the hardest mystery you've solved in first grade?   2.  What do you want to learn in second grade?

I did this interview with my daughter and created a QR code.  It turned out great!

Here's my steps to creating a QR code using Google Drive:

1. Video the interview.
2. Upload and email it yourself.
3. Upload it to Google Drive.
4. Click Shareable Link and mark the bubble that says anyone with this link can view.
5. Click done. Copy the link.
6. Go to a QR code generator website. I used QR Code Generator.  I signed up for free.
7. Paste the link in the box and click Create QR Code. Make sure it's on Static.  
8.  Download the image and print!!  It's a good idea to scan it before you print, just in case it doesn't work correctly. 


You can use these steps to create ANY kind of interview!  Students could interview each other or even another teacher.  You could video them giving their parents or grandparents a special message, the possibilities are endless!  


My newest product, Mystery Solvers: A QR Code Craftivity for Parent Teacher Conferences, includes a cute creativity, graphic organizers, and printables to extend this lesson of reviewing what we've learned in school so far.   Grab this FREEBIE to get you started!!


Thanks for stopping by!

-Meg
0

Do You Want to Build a Snowman? Practicing Place Value!

Hi friends! Jessica here from Pride and Primary! I hope everyone is having a fantastic start to the year. It has been so relaxing for me and I've been able to get a lot of things mapped out and ready for the year. 2016 is going to be amazing!

Have you seen this little gem floating around Social Media? It's so inspiring and I just love to give a shout out to all my fabulous punchies and fellow teachers out there!

Today I just wanted to share a simple little activity I created for my kiddos to kind of sum up our unit on place value and regrouping. Plus it's super adorable!


I needed a review activity for our Numbers to 120 unit and I needed to update the hallway because I am neither confirming nor denying that there may or may not have still had Christmas themed stuff out there. (Maybe, who can tell right?) So I made this! 


With this activity the kids can create a snowman by choosing a two or three snowball snowman, a scarf, and two or three buttons. Each addition has a value of tens or ones. They add them all together and show the total value of their snowman! 

I've included a recording page and a page to hang in the hallway with the snowman. 

Click HERE to grab this! 

I also created a QR code scavenger hunt scoot for early finishers to begin once they finished with this little activity. It was a review of all the topics we learned in the unit. 

I know you just love my photography skills. I'm the next Ansel Adams. 

Recording Page 
This one is more Annie Leibovitz, right? 

I tape the cards all over the room in different areas. 
They scan the codes, read the clue, and then they have to go off and find the answer! And NO the cards aren't in order! 

Please check it out HERE and let me know what you think! 

I hope everyone has a fabulous February!

Happy Teaching!

Jessica
1

Holiday QR Cards

Hi, friends! It's Sarah from Mrs B's First Grade. I'm here today to teach you an easy way to change up your holiday cards for parents this year. Have you ever thought about having your students record themselves saying their message and attaching it to a QR Code? Read on to find out how my class will be making them!
Mrs Barnett First Grade
As a first grade teacher, my students do not have the writing ability that can match their expressive language. My students have wonderful and funny things to say about their parents that they are unable to write down on paper. So, why not record them saying those things and turn it into a QR Code for them to send home? Below is a step by step guide for making Holiday QR Cards!
Mrs Barnett First Grade
To start making your cards, have your students record themselves sending a holiday message to their parents or families. I let my students take an iPad and flip the camera so that they can record themselves privately. They take their iPads around the room or out in the hall. If you do not have iPads or other devices in your classroom, you could record them using your phone.
Mrs Barnett First Grade
Once you have all of their videos recorded, you need to upload them to YouTube. I have a YouTube channel attached to my school email. I keep it private. When I upload a video to the channel I choose to keep it "unlisted." This means that only someone with the link can view it. I also use my students initials as the video title. I am not afraid of anyone looking, I just like to keep things as private as possible!
Mrs Barnett First Grade
After you have uploaded your video to YouTube, you need to attach it to a QR Code. This is more simple than it sounds! You can take the link to the video straight from the browser, or you can click the share button and get the link that they give you there.
Mrs Barnett First Grade
From there, you insert the link into qrstuff.com. You simply place it where it says "Website URL." Then you can choose a color for your QR Code and click "Download QR Code." Voila! You are done!
Mrs Barnett First Grade
The last step is fun! Print out the QR code and give it to your students to decorate. They can decorate or write anything they want on the front or back of the card. They just can not write anything on the QR Code itself. After this step they can take it home and have their parents scan it. They will be able to watch a video recording that is priceless! 
Mrs Barnett First Grade
What other special things have you done with QR codes? I would love to hear about them! 
0

QR Code Quirks

Hi friends! It's Jessica from Pride and Primary! I am so excited to be sharing on the Punchbowl today! As you may or may not know, my master's degree is in Educational Technology. I'm also pretty good at figuring out things when it comes to computers, software, and all that fun stuff!! So I'm hoping to give some useful tech tips here on the blog!
I LOVE using technology in the classroom. There are so many possibilities in the 21st century classroom. I thought I would share how I make my QR codes for my kiddos. I used to make them plain and simple using the generic text choice on most free QR Code maker websites. But it's tiny.
Very Simple Question
Now I pretty them up with pictures and fun text!

I apologize for the bad pictures but I have asked Santa for a new camera so maybe he will come through this year :)
This one they choose the correct spelling. 

Christmas theme!
This task card tells them what to do, they scan the code and then read the word. I've also done this one vice versa where they read the word, then scan to see what to do.

Like the pictures? Think this is something you would like to do? Then read on! 
Ok let's get started!! I like lists. So I'll be listing steps and teaching through pictures! 

First you have to make a picture. 
1. Open PowerPoint. 
2. Choose a Blank template. Change the slide size to 8.5 x 11. 

If you don't want to have to do this every single time you open PowerPoint, check out {THIS} tutorial from Sara J! 

3. Delete the boxes. 

Second, I like to make the cards 4 to a page so I insert a table. 
1. Click on Insert tab. 
2. Click on Table and drag the mouse over 2x2 squares. 
3. Click. 
4. BAM! 
5. Table is inserted. 

Follow these steps to format the table: 


I find these rectangles to be the perfect size for QR Codes and Task Cards and Problem Solving Cards and lots of other stuff. I have lots of these templates (multiple sizes, more columns, etc.) already stored in PowerPoint that I can pull up when needed. I do much better work when I have boundaries to keep me in check!!

Third, design your pictures! 

In this particular activity, we are studying digraphs. So the students will look at the picture and then choose the correct spelling. They will write the correct spelling on their recording page. 

Once you have designed your pictures, then you have to save them as one picture. 


Repeat with all of your pictures. Save them in a spot you can easily access and name them something you will remember and be able to differentiate the pics. For example, I create a folder in My Pictures file called "QR Code Pictures". Then I create a sub folder, in this case called "Digraphs" and I save the pics there. These would be called fish, shell, wheel, graph

Fourth, upload your pictures to a file sharing website, like Google Drive, Photobucket, Dropbox, your blog, etc. You need to host the pictures online so you can get a URL. 

Here's how I do Google Drive: 
1. Login to Google account. 
2. Create folder to hold pictures: QR Code Pictures. 
3. Share this folder: Anyone with the link can view. 
4. Open folder. 
5. Click New and upload pictures. 


After uploading the pictures, now you can make QR Codes! 
1. Select the picture. 
2. Click the link button. 
3. Highlight the link and copy it. 
If you press the CRTL key and the C key at the same time if copies it to the clipboard! Or you can always do the good ol' right click and copy from the drop down menu. I prefer shortcuts because I have no patience. At all. 

Then I use the trusty QR Stuff website (FREE) to make my QR codes. Google also has a QR code maker as does most of the Internet. Use what works for you!! 

I have my Internet Browser (Google Chrome) set up to always ask me where to save the file I download and to name it, rather than giving it some generic 12 digit number. This helps keep my computer files organized and I can always find where the stuff I download is! 
Make sure to rename the QR Code so you can find it easier. For example, the above code would be called "qr code fish" because that's the picture it links to. 

You can also screen shot the code, paste it in PowerPoint, and then crop the extra around the code instead of downloading it, but I think downloading is just the easiest. 

To set up Chrome to do this: 

 I can also show you how to do Mozilla Firefox if you would like!

Then after making the code, all that's left to do is create the task card. I do the same thing, open PowerPoint, insert table, insert pictures. But this go 'round I only do a border and I attach a number. 
I also do the cards in Black and White and print them on Astrobrights paper! I save ink, and it's bright and colorful! I don't have to worry about printing the codes in color and I save my sanity by using different color paper for different weeks. 

When they scan the code they get the colorful picture! I can also use this same template each time I make a new weekly Building Words center.
The frame is already there. 
The number is already there. 
Delete the current QR Code and replace it with a new one. 
Print on different colored paper. 
BAM! New weekly center. 
Recording page is the same way. Use a table. I also make a cover page and glue it onto a small brown clasp envelope. I store the recording page and the task cards inside.  

Here is my nephew helping me out with my compound words QR Codes. 


And speaking of Compound Words: I put one picture of the QR Code card and they scan to see the other picture, put the two pictures together, and they have the compound word! 


You like? Click {HERE} for this freebie on Digraphs and Compound Words. 

Well that's all I have for you today! I hope this tutorial helps you and is easy to follow. Please let me know if there is anything that needs to be clarified! 

I've also created this FORM so you can write down suggestions on future Tech Tutorials that you would like to see on The Primary Punchbowl or on Pride and Primary

Thanks for reading!

2
Powered by Blogger.